


It is that time again with only today to go... I am just about to dump in a massive folder full of pngs into my partners drop box. Of course I have 2 more posts to go after this but we have to start getting the gears in motion. I don't think we have done too bad for the minor project deadline. I am a little gutted that I couldn't get the adult Barnabas done in time for this unit but hopefully it wont be far behind this deadline. I will be cleaning each model up once more before we commit to the rigging so that is something else on the docket but it wont take long once I have them all...
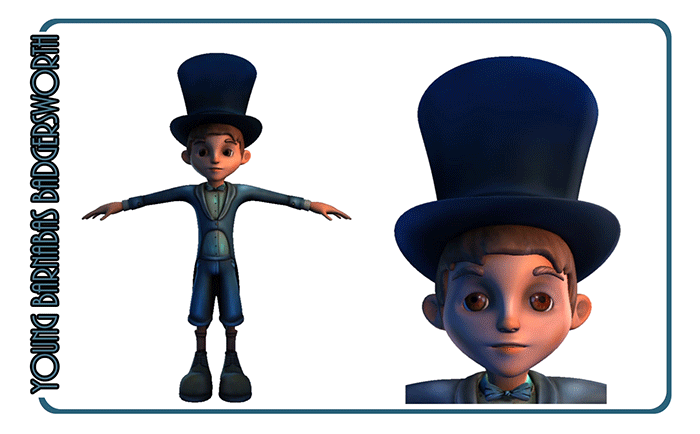
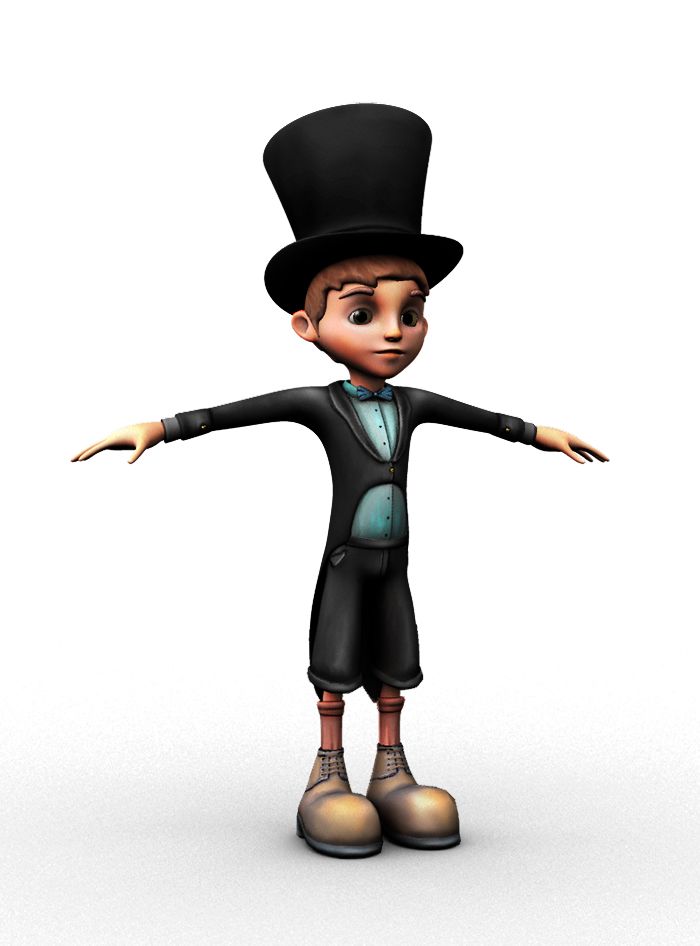
Now this post is about the textured Young Barnabas, these are not necessarily the final textures as they have to be surveyed by the lead artist Chrissie. I painted these models entirely by hand with a little help from some projection mapping. I painted everything possible but there are a couple of areas that still but me somewhat. It is actually weird this time around not to be using any bump maps... It more or less means that the texture painting has to be on top form. You have nothing to hide your ink so you have to go full on detail...
Anyway lets checkout the textured turnarounds for Young Barnabas Badgersworth

The image above shows a couple of basic material render passes from ZBrush. The flat colour is good for when you are doing paintwork. The fast shader is good for examining tone and colour values. The Blinn is good for bumps and surface deformation so this is pretty good for bump/normal maps. I generally dart about between them when doing a full work up on a character (I did this for the Driver). Its very handy to be able to adjust your field of view especially when tone is your weakness (as it is mine).... Still I am gradually getting better little by little...
From the Benjamin post I worried that I was focusing waaaaaay too much on trying to bake occlusion maps. It wasn't until later that I realised I shouldn't be baking them for these characters. The characters will be lit by in scene occlusion and will be comprised of render layers. The image above is a single occlusion/standard render composite of the textured Young Barnabas model. As you can see the scene does most of the work I think I got a little confused from my last unit here. Still its a mistake made and learnt from I will remember this image when I think of bake maps.
I created a video of my entire poly-painting process this time around just so people could see what went into the texture of this model. I also flew into a little introduction giving a basic ins and outs guide to ZBrush and sub tools. It's just one more video for the long list really. I still have to post all of these over at the 365 day project site... That's gonna have to happen gradually me thinks. I need to sleep after getting these posts done. I am soooo glad I got this far within this period of time, I have my confidence back so now modelling the last two should be fine.
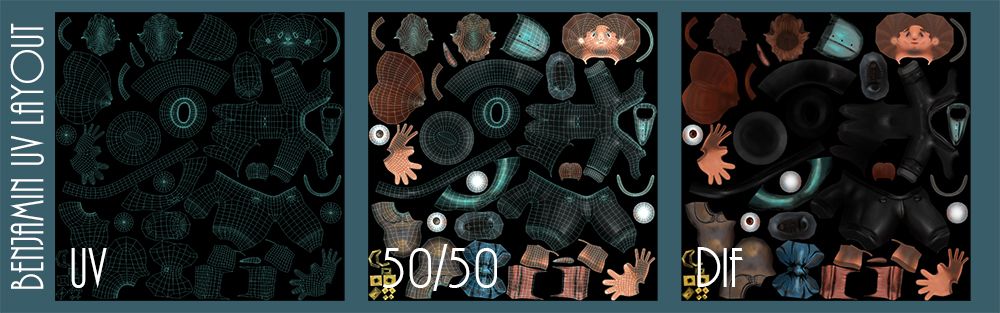
The final image entry for this post is the epic UV mapping which took a little while to get right. I'm still not sure if its the right way to go so Sammy and Chrissie will take a look at the model themselves and give me the SP. There is actually a little baked occlusion in there to dampen down some of the areas which are still too bright on the model. Of course I did limit the opacity on it and rub out some key things which made the model look hideous. Of course I didn't factor in at this point that the model would be lit by scene occlusion meaning texture occlusion wasn't needed.
This post will knock out one of my last for this Unit don't worry I wont be spilling any tears not that I don't enjoy the workload. A brief is like anything it can get old if you don't keep the work fresh. This is one of the reasons I post so many extra pictures. They are not really for anyone other then me just so I can keep the light in my eyes burning bright. The next Unit will be the Major but this project continues I have to get the final two models sorted and then get rigging. Then we will be sitting down to get the animation going... its gonna be one hell of a ride. Woop!
Later!
xXStItChXx
No comments:
Post a Comment