


Well here it is 3 for 3 and hopefully the last Benjamin modelling post. I have to get cracking with Barnabas today to be sure to get it done for next week. I have added everything to this model including a mouth box. The UV maps are also pretty tight and I'm really happy that I got to adjust the hair one last time because it was annoying me how flat his hair was. The problem with Benjamin having puffy hair is the top hat. Without changing its shape it makes fitting his head in a nightmare. I have got it to an acceptable level though... Maybe Alan can guide me later.
I thought I would conclude this model on my end in classical style doing a couple of nice turnarounds in the form of an animated gif. If there is time towards the end I will see if I can get a Weta concept out of him but my priority is getting the models present for the hand in next week. This unit has been a bit of an emotional rollercoaster. There has also been a few other slow moments, things always seem to get difficult over Christmas. I kind of miss my wide family, we have been splintered since the loss of my old man... Hey-ho.
Anyway lets take a look at the Benjamin 3D model turnarounds woop woop!
The image above shows 3 turnaround views of the Benjamin 3D model. The shaded view shows the model in its generic glory. The UV view shows the seem placement and the quality of the UV Mapping. The Wire view shows the flow of the geometry itself as well as the consistency of its edge flow. Its handy to see these views before seeing a model in its entirety, well I feel it does. It allows you to appreciate what the end result is when you consider everything that is going on underneath. I have started making a habit of doing this... it only helps ;)
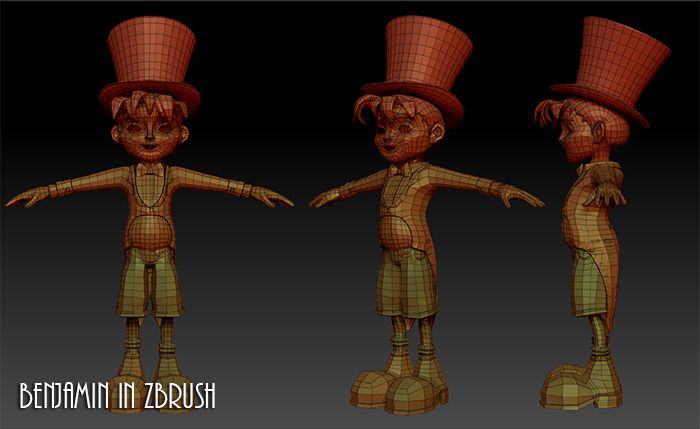
From here I took a little dive into ZBrush, its handy to see how it responds in other applications I find. ZBrush also has a way of demonstrating the divides between the geometry. Notice how the legs are coloured different from the head and legs. In ZBrush these are called poly-groups while in Maya they are just separate geometry. ZBrush is also good at pointing out if you have bad loops as you can pump up the subdivides to see if anything goes wrong. I also use ZBrush when modelling to smooth the surface mesh if I have a mass of distortion in my edge flow.
The video above shows the polygonal count difference between my initial subdivide for Benjamin and sub divide 2. Subdividing makes the geometry smoother as it moves the geometry evenly across the surface of the mesh. The problem is it ramps up render times and can really make your life hell if you haven't rigged or textured before dividing. The process has to be done in a specific order if you want to avoid any unnecessary hassle. It's an easy thing to say but a much harder thing to do and drill into your mind. I'm sure if I keep saying it... it will stick with me.
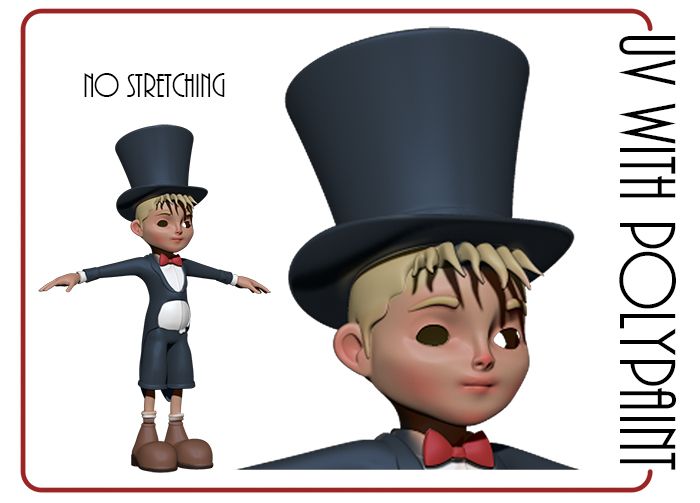
Lastly because I had it in ZBrush and because I couldn't resist to see how the UV maps were working I did a little poly-painting. Again I am not sure if this is anything near what the girls had in mind for the attire of Benjamin. I kind of went with what I would consider. You will probably also notice that he has a shorter fringe here. I changed that as it made his hair look too flat to me. I bushed it up on the later one and made it protrude more. There are a few little gaps under the hat but it will do for this stage. Its been a nightmare getting that hat and hair to fit together.
All of this has been pretty fun, I take a while to get into modelling mainly because I am just scared that I will totally cock up. I'm not one for confidence sadly but once I'm back in the flow I usually find my confidence. I only hope that Sammy and Chrissie and everyone has had a lovely new year. I would like to apologise to them once again for getting this up so late. Things have been a little hectic. I am quite happy with the model in this amalgamation though. Everything that isn't modelled in is just going to be painted on (that includes shoe laces).
Anyway that makes update 3
Catcha later people!
xXStItChXx
Benjamin is looking great!! Can't wait to see the final renders!! - and of course a real life 3d model!!
ReplyDelete