


I am back writing another post I am a little annoyed as blogger keeps deciding to delete what I type in here so this is actually my second time doing the same post. The other week I knocked up some UV maps for Benjamin just to see how long it would take me. Luckily enough it only took a day so I'm confident that when I sit down to do Barnabas's we should be okay. I have knocked up another Operation Z video to demonstrate the ZUV's on our little Benjamin model. I'm hoping that having done the UV's will allow the girls just to focus on getting him textured.
We don't have long to get quite a few bits done by next week but I am confident that we will get everything to a high standard. I tried to keep Benjamin relatively low poly so we could go up freely, as Alan said you want to place your detail where you need it. Subdividing will only add to the quality of your detailed areas. The UV mapping is also simpler as you have less points to map especially if you can easily bump it up to increase the quality of your model. Still its been weird getting back into everything, I'm hoping things keep coming thick and fast.
Anyway lets check out the UV Mapping for Benjamin Badgersworth Woop Woop!
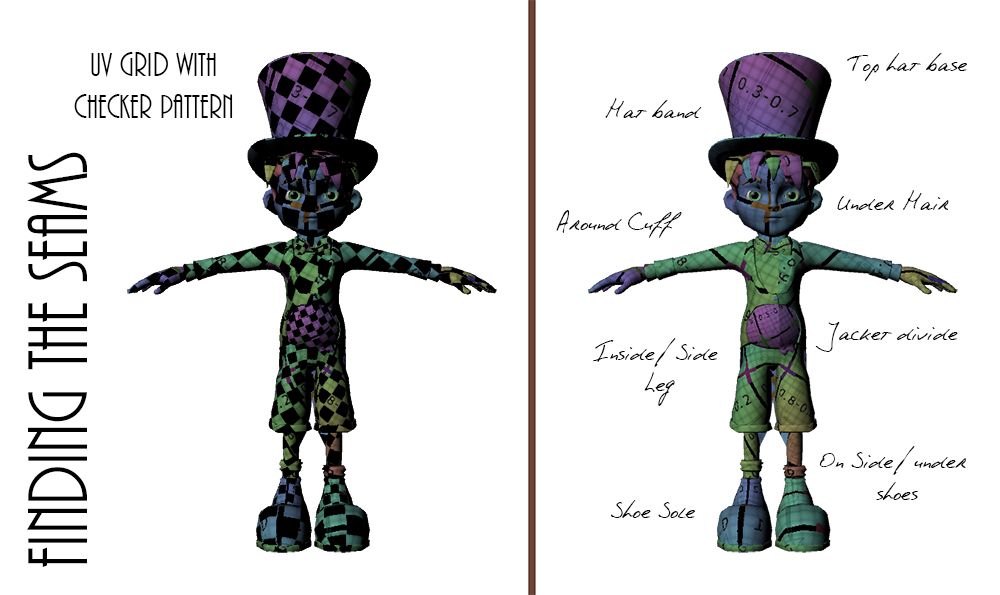
One of the things I tend to do when UV mapping is throw some kind of texture on to see if the polygons on the model are working effectively with the texture. I usually throw on either a checker or a UV grid texture which can be found on google. In the image above I have shown my Benjamin model and have identified some of the more obvious front on seams. Myself and my business partner have a little game we play when looking at game models, we like to see if we can identify the locations of the seams... Geeky I know but I guess we don't care.
The video above shows the ZUV's on my Benjamin character Mesh. I always find this handy to identify if there are any crappy overlaps. Obviously there are other ways to do it but I like being able to see my 3D model turn into its UV map I guess its a nicety. I also tend to do rough paint tests within ZBrush too just to see if there is any nasty stretching on the model. I always tend to notice it in places like the lips. It usually stretches where seems are evident. You have to keep your eyes open and check that everything works before sending it off...
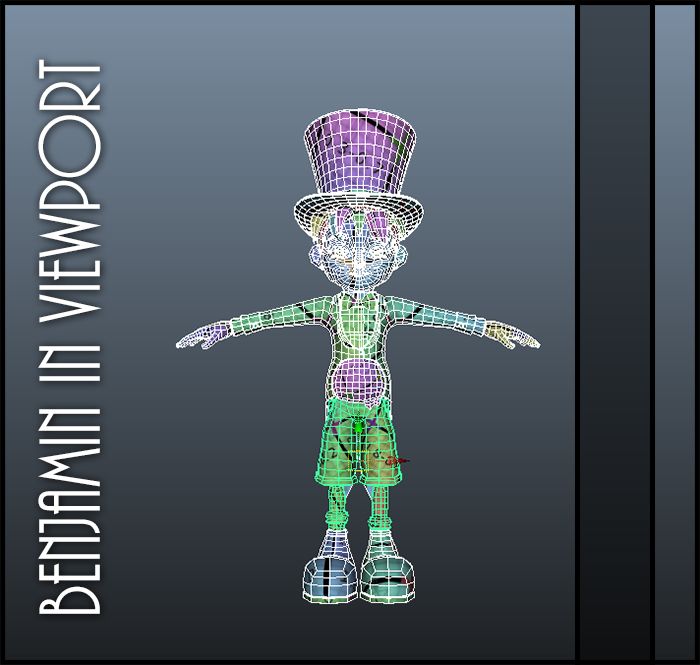
The image above shows little Benjamin within the Maya viewport. I figured this would be a chance for people to see how his geometry looks. My modelling lecturer Alan recently told me that I needed to keep considering the even edge flow. That is even polygons across the model. This keeps geometry very neat and if the flow works it can make your life a hell of a lot easier. UV maps tend to work out easier if the geometry flows nicely. More then anything though I take pride in the placement of my seams mainly because I don't want to be Wally.
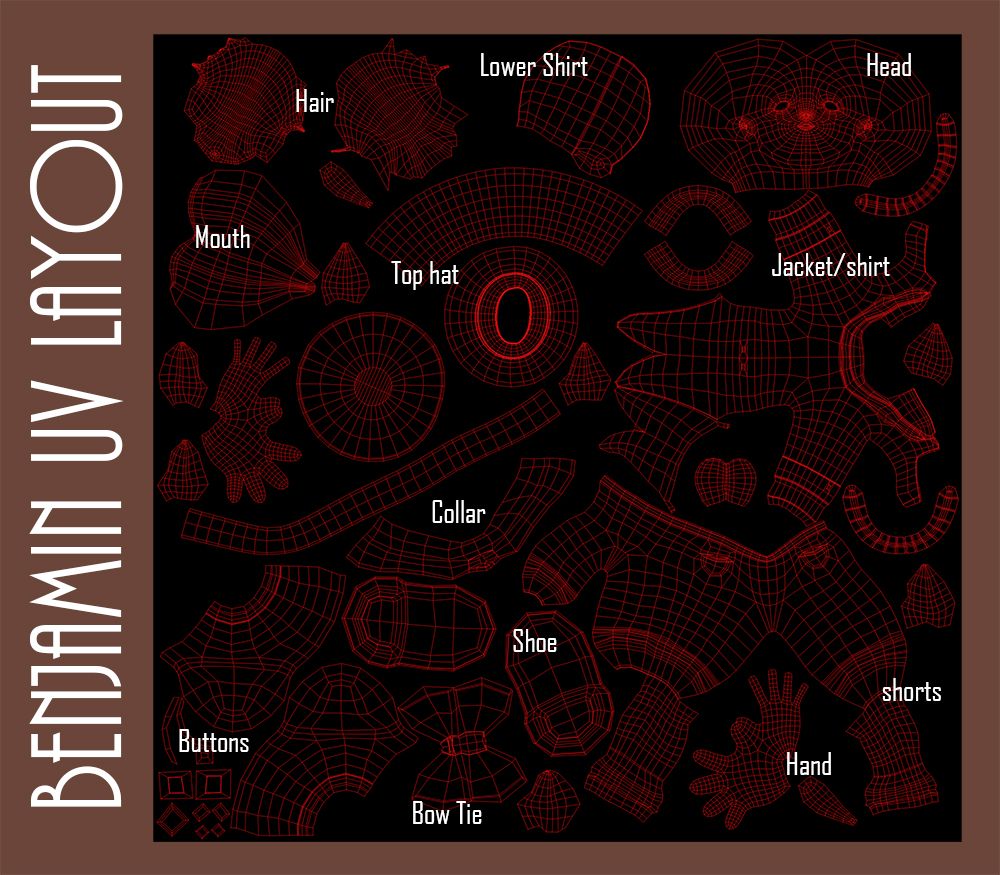
Last but not least is my UV Map, which I coloured red to keep the colour flow of the characters. I have identified a couple of the parts of the UV maps for you not that you need to. The ZUV video above shows you which map goes to which piece of geometry. The key when laying out UVs is to make sure everything is correctly scaled. You don't want insignificant items such as a button or something taking priority over the size of the face UV. You want details to be found in the face and hands more. You just have to keep your wits about you.
Anyway I think that's enough discussion on UV mapping for one day. I do have another post coming in a bit so providing I don't pass out we should be fine. I want to get this model out today or at least find out from the girls if they want the model to get the texturing going. Alternatively I don't mind having a play. The key to texturing is to make sure you have baked in occlusion maps, at least that's what helped when I was doing the Driver. It would be nice to have a few bits of work to impress on the hand in date next week. Its getting so close gotta keep cracking on!
Take it easy!
xXStItChXx
No comments:
Post a Comment